Showing posts with label Vegetables. Show all posts

Monday, June 30, 2014

Healthy Faux Mashed Potatoes - OMG Drive These Around the Block!


I've heard about making mashed potatoes from cauliflower.  I've heard they were delicious and I've heard about the health benefits.  None of this swayed me or made me the least bit interested in trying them.

But then I read and article and decided to take a gamble and try these.  Summer is here and the heat is making us crave light foods.  This is a two-fer...veggies and a faux starch side dish.  The flavor is fantastic and if you're trying to get veggies in your little sous chefs, this is the real deal.


1 medium head of cauliflower washed and chopped
1 tablespoon plain, non-fat Greek yogurt
1/4 cup low-sodium chicken stock
1 clove of garlic, rough chopped
1/4 cup grated Parmesan cheese
1 tablespoon extra virgin olive oil
Chopped chives for garnish
Kosher salt
Black Pepper

Heat a large pot of water to boiling, add a tablespoon of salt and the chopped cauliflower.  Boil until tender, about 10 minutes.  Drain in a colander and blot with a paper towel.  

Place the drained cauliflower in the bowl of your food processor, add in the garlic, chicken stock, yogurt and Parmesan cheese.  Pulse until smooth.  Stream in the olive oil,  Season with a pinch of salt and black pepper to taste.  Garnish with chopped chives.

Now you have a healthy, delicious, figure friendly side dish you prepare in a blink of an eye!


Pin It

Thursday, April 24, 2014

Maque Choux


Maque Choux, what is it? How do you even pronounce it?  Maque Choux, pronounced Mach Shoe, it a corn dish cooked with tomatoes.  There are many variations, such as cooking it with shrimp, andouille sausage or tasso ham, as I have here.  It's thought that the Cajuns brought the method of this dish with them when they settled in Southeast Louisiana from Nova Scotia and added the corn which was a staple of the Native Americans already settled in the area.

What I do know is my version of this dish can stand alone as an entree or as a hearty side dish.


2 tablespoons canola oil
1/2 cup finely chopped yellow onion
1/2 red bell pepper diced
1 tablespoon minced garlic
1 stalk celery diced
1 jalapeno, finely chopped
1-1/2 cups thinly sliced tasso ham
1 can fire roasted, diced tomatoes
2 tablespoons chopped, fresh thyme
3 ears fresh corn
1/2 cup half-n-half or evaporated milk
1/2 cup vegetable stock
Salt and pepper to taste
2 tablespoons chopped parsley (optional)

Heat up the canola oil in a saute pan over medium heat.  Add the onions and cook them until they begin to soften, about 3 to 4 minutes.  Stir in the tasso ham, red bell peppers, celery, garlic and jalapeno peppers.  Continue sauteing for 3 to 4 more minutes.  While the veggies are sauteing, slice the corn kernels from the cob, hang on to the cobs. Add the corn kernels and the thyme to the pan,  cook for about 2 more minutes.  Using a spoon, scrape the milky liquid from the corn cobs into the saute pan, then add the fire roasted tomatoes, half-n-half and vegetable stock.  Allow everything to come to a simmer and lower heat and gently simmer for 20 minutes, until the sauce thickens.  Season to taste with salt and pepper and garnish with parsley. 

Then there's this:


 So delicious, you'll have to give this a try!


Pin It

Wednesday, September 19, 2012

Pickled Red Onions Great Topping for Potato Salad

It's the end of the summer and so many of you are putting up or caning your summer fruits and veggie or pickling.  I really would like to learn more about this but first I have to grow some fruits and veggies.

I found and easy pickling recipe for red onions and had to pass this along.  These can be used in a salad, whether it be lettuce, pasta or potato.


1-1/2 cups red wine vinegar
2 tablespoons sugar
1 teaspoon mustard seeds Kosher salt
1 medium red onion, thinly sliced


Bring the vinegar, sugar, mustard seeds and 1 tablespoon of Kosher salt to a boil in a small sauce pan.  Boil for about 1 minute to dissolve the sugar and salt.  Remove from the heat and transfer to a small bowl or Mason jar to cool.  Allow to cool for about 10 minutes, then stir in the onions.  Cover or cap and refrigerate for at least one hour before using.  These will last in the refrigerator for about 3 days.


I served these on top of some warm mustard potato salad which was a huge hit with the our fellow tailgaters for the big UT/Florida game!

Tonight, they will be the star of a beautiful pasta salad!


Pin It

Wednesday, September 12, 2012

Farmer's Market Green Bean Salad


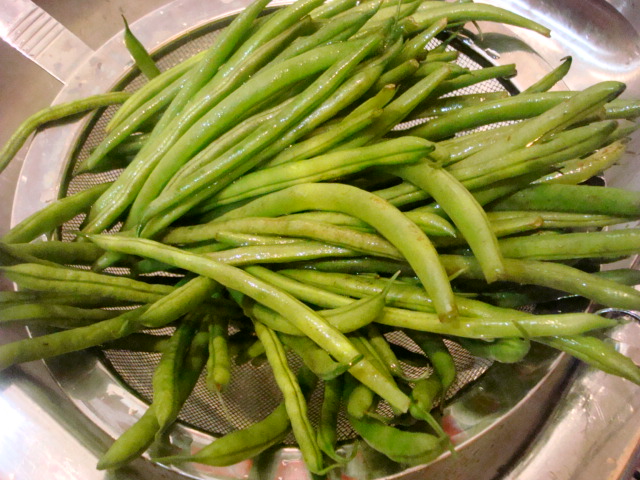
I found these gorgeous haricot verts at our local Farmer's Market during the summer and was particularly attracted to the dark, purple-ish beans.

The vendor told me as soon as the dark beans "get heated up" they turn dark green and they tasted just like a regular green bean.

I bought them anyway and lo and behold, they did lose their purple color, they were a darker shade of green than the other green beans.

No doubt these beautiful beans would be perfect as a summer salad.

1/2 lb. each of your favorite three fresh whole green beans totaling 1-1/2 lbs of whole green beans
                 Trimmed, rinsed and drained
1 small red onion roughly chopped
1 tablespoon Dijon mustard
1 lemon, juiced (approximately 1/4 cup)
1/3 cup extra virgin olive oil
Pinch of sugar
Kosher salt and freshly ground black pepper to taste

Blanch the beans in a large pot of salted, boiling water for 3 minutes.  Immediately drain the beans and transfer them to a large bowl of ice water to stop the cooking process.  This will also allow the beans to maintain their crispiness.  Leave the beans in the ice water for a couple of minutes to cool them off, the drain them thoroughly in a colander.

In a bowl or Mason jar, whisk together or shake the Dijon mustard, lemon juice and sugar.  Then add in the olive oil and whisk or shake the jar vigorously to emulsify.

Place the beans and onions in a large bowl, toss together to combine.  Drizzle the dressing over the beans and toss again to evenly coat the beans with the dressing.  Season with salt and pepper to taste.

Cover and refrigerate for at least 2 hours, actually, the longer the beans can marinate in the dressing, the better they will taste.


I need to make this one more time before the hot weather leaves us this season!


Pin It

Wednesday, August 22, 2012

Golden Skillet Chicken with Vegetables

I happened to catch Jaime Deen's new show on the Food Network a couple of weeks ago.  I was extremely curious about his combination of fennel seeds and rosemary on chicken.  Well, curiosity got the best of me and I did this from memory since I was too lazy to walk to the next room to print out the recipe.

This was a fantastic week night meal...one pan..cooking in the oven; the only thing more I could asked for is elves to clean up the kitchen and dining room.

Reheat the oven to 350 degrees F.


Butterfly a whole chicken (fryer).  One the inside of the chicken make a snip on the breast bone, then hope the chicken, skin side facing you, holding the outer edges of the breast/wing, bend the chicken toward you until you hear the breast bone crack, now the chicken will lay flat. I find butterflying the chicken easiest with with poultry shears, but if you're an ace with a sharp knife, go for it!  

Season the underside of the chicken with salt and pepper then season the skin side with salt, pepper, 2 teaspoons crushed fennel seeds (I crushed mine in a mortar with a pedestal), 1 teaspoon dried rosemary. 


Peel two carrots, cut in half and then in to pieces about one-inch long.  Use about 4 to 6, scrubbed, #1  golden or fingerling potatoes, cut in half, 2 shallots, peeled and cut in half.  Place the veggies in a bowl, drizzle with olive oil and season with salt and pepper.  Toss the veggies to make sure they are evenly coated with the oil and seasonings, set aside.


Pre-heat a cast iron skillet over medium-high heat with 2 tablespoons of olive oil.  Once the skillet is hot, place the chicken in skin side down and sear for about 5 to 6 minutes.  Turn over and cook for an additional five minutes and add the veggies to the skillet around the outside perimeter of the chicken.


Place the skillet in the oven and cook for 1 hour or until a meat thermometer registers 170 degrees and the juices run clear.    Remove the chicken and veggies from the oven to a platter.  Loosely tent with foil and allow it to rest for about 10 minutes.  Return the skillet to the stove over medium heat and pour in 1 cup of white wine and de-glaze the skillet for 1 minutes, scraping up the browned bits.  then stir in 1 cup of chicken broth and reduce by half.  Stir in 1 tablespoon of butter.


Carve the chicken into serving pieces, serve with a generous portion of veggies and don't forget to ladle on that delicious pan gravy.  Garnish with a little chopped fresh parsley and you have yourself one heck of a meal!

Now that's a plate full of love! 


Pin It

Monday, June 11, 2012

Grilled Asian Eggplant


This has to be one of most simple and tasty vegetables to enjoy this summer.  We were looking for something a little different to do with eggplant on the grill besides the usual garlic and Parmesan that we all enjoy.  We were in the mood for something with an Asian flair and experimented and came up with scrumptious side dish.

2 cloves garlic, rough chopped
1/2 teaspoon Kosher salt plus more for seasoning
Freshly ground black pepper
2 tablespoons rice vinegar
2 tablespoons Tamari or regular soy sauce
1 tablespoon dark sesame oil
1/4 teaspoon red pepper flakes
1 eggplant
Canola oil
2 tablespoons finely chopped flat-leaf parsley


Sprinkle the Kosher salt over the chopped garlic and using the side of a chef knife, make a paste with garlic by smashing the garlic and pressing the side of the knife over the garlic.  Place the garlic past in a small bowl.

Whisk into the garlic paste, the vinegar, Tamari and sesame oil.  Place the red pepper flakes in the palm of your hand and press them with the thumb of your other hand to release the oils. Whisk into the garlic/Tamari liquid. Set aside.
Heat grill to high. Spray grates with non-stick cooking spray.

Peel the eggplant and cut into 1-inch wide by 1/2-inch thick strips.  Season the eggplant with salt and pepper, then brush with the garlic/Tamari mixture. Place the eggplant strips on the grill just until slightly charred.  Turn and brush with mixture. 

Once both sides are slightly charred, place on a serving platter and garnish with chopped parsley.  Serve immediately.

Pin It

Saturday, May 26, 2012

Grilled Corn on the Cob with Whipped Barbecue Butter


Ah, the wonderful smells of spring and summer...the abundance of fresh fruit and vegetables, does it get any better?  Of course it does!  The aroma of those fresh finds from the Farmer's Market doing their thing on the grill.  It doesn't end there, oh no,  jazz up your bounty and then spoil your self silly enjoying the wonderful tastes with those you love and/or enjoying being around.I found this Bobby Flay recipe some time back and it's a staple during the summer months when fresh corn is plentiful.


Whipped Barbecue Butter:

2 tablespoons Canola oil
1/2 of a small red onion, chopped
2 cloves garlic, chopped
1 tablespoon Ancho chili powder
2 teaspoons Spanish paprika
1 teaspoon toasted cumin seeds
1/2 teaspoon cayenne powder
1/2 cup water
1-1/2 sticks unsalted butter, room temperature
1 teaspoon Worcestershire sauce
Kosher salt and freshly ground pepper

In a saute pan, heat the oil over high heat until rippling and almost smoking. Add the onion and saute until soft, 1 to 2 minutes, then add in the garlic and cook for 30 more seconds. Sprinkle in the Ancho powder, paprika, cumin seeds and cayenne.  Stir to thoroughly combine and cook for 1 minute. Add the 1/2 cup of water and cook until the mixture becomes thickened and the water reduces. Remove from heat and let cool slightly.

Place the butter in a the bowl of a food processor, add the spice mixture and Worcestershire sauce and process until smooth. Season with salt and pepper, scrape the mixture into a small bowl, cover and refrigerate for at least 30 minutes to allow the flavors to marry. Bring to room temperature before serving and spread the butter over the corn while hot.

Grilled Corn:

4 ears corn
Kosher Salt

Heat the grill to medium.

Pull the outer husks down the ear to the base or completely off. Strip away the silk from each ear of corn by hand. If keeping the husks, (which I can't seem to do without ripping them to shreds my family prefers no husks) fold husks back into place and tie the ends together with kitchen string. Place the ears of corn in a large bowl of cold water with 1 tablespoon of salt for 10 minutes.

Remove corn from water and shake off excess. Place the corn on the grill, close the cover and grill for 15 to 20 minutes, turning every 5 minutes, or until kernels are tender or to desired doneness. A.J. we like ours a tad bit on the charred side.

Now, go forth and grill some produce!


Wednesday, November 9, 2011

Cane Syrup Glazed Acorn Squash

The first time either A.J. or I had acorn squash was last fall.  I saw the Neely's prepare this with maple syrup and thought I was game to try it.  I don't know why I haven't blogged this before because in the fall we have this just about every Saturday night.  I don't know why neither of our mothers ever made this either.  More things to ask my mom, "Why?"

This one of the easiest sides to make and if this is really a vegetable, which I have my doubts, your picky eaters will think you've lost your marbles and are feeding them dessert.

I've made this using Steen's Cane Syrup which is what I grew up on in New Orleans and I think you can buy it online, and I've made this once with real maple syrup which is kind of pricey.  We like the cane syrup better but it has a deeper and richer flavor and more body.  I bet you could even use a half and half combination of dark corn syrup and molasses if you have them in your pantry.

2 tablespoons extra virgin olive oil
2 tablespoons light  brown sugar
2 tablespoons real maple syrup
2 small acorn squash, cut in half, seeds removed
Kosher salt and freshly ground black pepper
Butter, for topping (optional)

Preheat the oven to 425 degrees F.

Mix the olive oil, brown sugar, and cane syrup (or maple syrup) together in a small bowl. Put the acorn squash, cut side up, in a single layer on a baking sheet. Brush the glaze on the flesh of the squash and season with salt, and pepper, to taste.

Put the squash in the oven and roast it until tender and golden brown, about 40 to 45 minutes. Remove the squash from the oven and transfer it to a serving dish. (Option, top with butter and serve.)

The combination of the savory and sweet is a winner! 


Wednesday, October 19, 2011

Corn Chowder


I don't know how the weather is in your neck of the woods, but here in East Tennessee, it's cold and rainy, downright miserable.  I should be curled up with a good book or a good movie!

Did I ever tell you that when I first met my husband the only "vegetable" he would eat was corn?  Well A.J. now knows corn is not a vegetable, plus he has many new favorite real vegetables.  I now know if I serve ANYTHING with the word "corn" in it, he's the first one at the table when dinner is ready.  So from here on out, every recipe, be it salad or brownies is going to be called "corn" something or other...nah, that's just plain boring.

Well, let me tell you that this soup is anything but boring!

4 strips hickory smoked bacon
1 tablespoon butter

Extra-virgin olive oil
1 onion, chopped
3 garlic cloves, minced
1/4 cup all-purpose flour
6 cups of chicken or vegetable stock
2 cups heavy cream
3 Yukon gold or russet potatoes, peeled and diced
6 ears of fresh corn cut from the cob or 2lbs. frozen kernel corn
Salt and freshly ground black pepper
Cayenne (optional)
1/4 cup freshly grated sharp cheddar cheese


Cook the bacon in a large stock pot until crisp.  Remove from pot with a slotted spoon and allow to drain on a paper towel lined plate and reserve.  Remove all but 2 tablespoons of bacon fat from the pot and add one tablespoon of butter to the pot, lower the heat to medium and add the onion and saute until translucent then add the garlic and saute 1 more minute.. Dust the vegetables with flour and stir to coat everything well.  Cook the flour off for about 3 to 4 minutes, stirring constantly to make sure nothing sticks and burns on the bottom of the pot.


Whisk in the stock one cup at a time and bring to a boil.


Add the potatoes, bring to a boil.  Boil for about 5 minutes, until the potatoes soften and are almost to the point of breaking down.  The broken-down potatoes will give the soup body and a smooth texture and the potatoes that remain in tact with the the soup a little something-something.


Add the cream to the soup, gently stir to blend.  Once the soup begins to bubble, lower the heat to simmer and cook for about 15 minutes; enough time for the corn to soften up a bit.  Season to taste with salt and pepper and a little splash of extra virgin olive oil and maybe even a little dash of cayenne.


 Ladle a generous helping of this hearty chowder into a bowl and garnish with the sharp cheddar cheese and the reserved bacon.


Does anyone know who got kicked off "Dancing with the Stars" this week?  Wait, don't tell me, I want to be surprised!

Stay warm, dry and well-fed!


Monday, October 10, 2011

This Ain't Ya Mama's Green Bean Casserole


Thanksgiving is creeping up on us ever so quietly.  Some of you real organized people out there already have your menu planned, the table set and the giblets gibletting.  Sorry to say, not me. I am tweaking and primping. 

A couple of years ago, I showed you a N'Awlins style Thanksgiving and passed a comment to the effect that I thought it might just be against the law not to serve green bean casserole on Thanksgiving.  I've been a rebel because I've never, ever served it at my table.   The whole cream of mushroom soup grossed me out.   It's so salty, and tastes blech!

I found a way to make a way better green bean casserole and I'm sharing it with you early in case you want to try it out and surprise your gift the the new green bean Casserole on the block!


Rinse and drain 1 lb. of haricot verts (fresh, French style green beans).


Add the greens beans to a pot of boiling, generously salted water.  Once the water returns to a boil, cook the beans for 2 minutes.


Use a slotted spoon or colander to drain;  remove the beans from the boiling water and immediately immerse them in an ice bath to stop them from cooking.  This beans will be tender but crispy when you serve them.  So much better than the limp beans in a can.  Once the beans have cooled, drain and set them aside.


In a large skillet over medium-high heat, melt 2 tablespoons of butter and heat 1 tablespoon of extra virgin olive oil.


Once the butter begins to bubble, add in 1lb. of sliced mushrooms and 1 tablespoon of chopped, fresh thyme leaves.  Either button mushrooms or baby bellas will work nicely.  Saute the mushrooms until they begin to turn golden brown.  Don't move them around too much.  After the mushrooms have been cooking for about 5 minutes, add in 2 tablespoons of minced garlic and saute along with the mushrooms.  This will take about 10 minutes.  Once the mushrooms have browned, add 2 tablespoons of flour to the skillet and thoroughly blend in with the mushrooms and oil.  Stir frequently and allow the flour to cook for about 2 minutes to get rid the pasty flavor.


 Lower heat to medium and slowly add 3/4 cup chicken broth and thoroughly combine.


Add 3/4 cup heavy cream.  Gently stir to combine.  Allow the mixture to come to a low boil, lower heat to medium-low and gently simmer for 5 to 7 minutes. 


Season with salt and pepper.


Remove the skillet from the heat and fold in 1 cup of shredded Gruyere cheese until cheese is melted.


Toss in the green beans until they are completely covered with the creamy mushroom mixture.  Turn the green beans into a buttered, oven-safe casserole dish.


In a medium bowl, combine 1 cup of French fried onions, 1/2 cup chopped pecans and 1/2 cup Panko crumbs.  Stir in 4 tablespoons of melted butter.


Pour the topping over the green beans.  Bake in a preheated 375 degree F oven for 30 minutes.  check the casserole after 20 minutes.  if top is sufficiently browned, cover with foil and continue baking for the remaining 10 minutes.


I'm seeing so many Thanksgiving law-abiding cooks out there this holiday season.

Happy early Thanksgiving!


Wednesday, September 28, 2011

Mushrooms Parmesan

I guess if it will hold still long enough, I can "Parmesan" just about anything.  Something about cheese, especially Parmesan, Asiago, and Romano either separate or combined together, the aroma, the flavor, gives me the warm and fuzzies!

1/2 lb. sliced Baby Bella mushrooms
2 tablespoons chopped parsley
2 teaspoon garlic, minced
1/2 cup seasoned bread crumbs
1/2 cup grated Parmesan cheese
Salt and pepper to taste
1/4 cup extra virgin olive oil
2 tablespoons white wine

Preheat the oven to 350 degrees F


Place the mushrooms in a buttered baking dish, sprinkle with parsley and garlic.  Toss to combine.


Add 1/2 of the bread crumbs and half of the Parmesan cheese to the mushrooms...


Add the white wine,


Drizzle the olive oil and then toss again to combine all of the ingredients.


Sprinkle the remaining bread crumbs and Parmesan cheese over the top and give it a little drizzle of olive oil.  Bake at 350 degrees for 20 to 25 minutes.


Serve hot!  Savor, enjoy; there will not be any leftovers!


Don't forget to comment by September 29th on my Dinner@ 6 American Express Giveway post for your chance to win a $100 gift card!