Monday, August 29, 2011

Greek Grilled Chicken Salad and Lots of Swag Courtesy of Girard's!!!

Girard's is introducing four new salad dressings and I was lucky enough to get a sneak preview, plus they sent me A LOT of swag!  One of you lucky, lucky readers is going to get all four of  these scrumptious new salad dressings plus all this swag. 
This week I will post recipes using these new salad dressings to add a little pop to your weekday meals.

Come take a look and start plotting how you're going to win Girard's Kitchen Epicurean Expert salad dressings and lots of swag.


What are all of these goodies?  One bottle each of these delicious salad dressings - Greek Feta Vinaigrette, White Balsamic Vinaigrette, Light Champagne Dressing, Old Venice Italian Dressing.


Stainless steel recipe card holder, great for recipes and reminders and stainless steel soap that removes strong odors during your food preparations.


Eco-friendly bamboo wood utensils so you can toss and serve in style and 100% natural cotton tote bag for those last minute produce trips or trips to your local Farmer's Market.


Girard's Salad Dressing Recipe Booklet for culinary inspiration and a cotton twill full-length embroidered apron with pockets to keep you stain-free and styling!

Now for the main event, Greek Grilled Chicken Salad!  I was inspired by one of the recipes in the salad dressing booklet and put my own spin on it. Doesn't it look gorgeous.  So light, healthy and with wonderful flavors tapping on all of your taste buds.


1 bag (16 oz.) broccoli and cauliflower florets
1 boneless, skinless chicken breast, seasoned, grilled and thinly sliced.
3 tablespoons extra virgin olive oil
1/4 cup roasted red bell peppers, diced (if using jarred, use the kind packed in water)
2 tablespoons Kalamata olives, pitted and quartered
Kosher salt and black pepper
1/2 cup Girard's Greek Feta Vinaigrette

Place the broccoli and cauliflower florets in a bowl, drizzle with olive oil and season with salt and pepper.  Place the florets on a pre-heated grill pan and grill until slightly browned.

Remove from grill and place in a serving bowl.  Add the sliced grilled chicken to the bowl and pour Girard's Greek Feta Vinaigrette.  Toss to coat evenly then add the roasted red peppers and the Kalamata olives.  Toss again to thoroughly combine.  Season with salt and pepper to taste and enjoy!

We enjoyed this warm, but this lovely meal can be enjoyed chilled also.

We ate this for lunch yesterday and I can't wait to enjoy this again for lunch today and make my co-workers jealous.

For the giveaway, you can earn uber many chances to win. Leave a comment on any of my Girard posts this week, leave another comment if you're a follower.  If you're not a follower, follow and leave another comment.  Follow me on Twitter and tweet about this giveaway, will entitle you to two more chances. "Like" Smoky Mountain Cafe on Facebook gives you another chance!


Wednesday, August 24, 2011

Smoky Mountain Muffaletta


We've tried various olive salads sold around town; some are freshly prepared and some are shipped from New Orleans.  The one thing they all have in common is way too much olive oil.  Why fight it; why not be creative?  So this is what happened...

A couple of days ago on my lunch hour, I went to one of my favorite grocery stores in Knoxville to get some sliced pancetta.  While at the deli counter, I noticed they carried mortadella!  One-half pound please and a half pound of hard salami; oh, I also need a half pound of provolone cheese too, please!

Okay now what kind of bread can I get?  I found a round loaf of an Italian type bread labeled "Parmesan Garlic" with sesame seeds on top;  very much like the muffaletta bun found in New Orleans.

That evening, after draining a can of quartered artichoke hearts, I placed them in a bowl with a generous handful of sliced baby bella mushrooms, about one dozen Kalamata olives (cut in half) and one tablespoon of minced garlic.   I drizzled some extra virgin olive oil over the vegetable mixture and seasoned it with salt and pepper.

The vegetable mixture was placed on a grill pan over direct heat on a preheated gas grill.  I stood over the grill, and tossed and turned the veggies as necessary to get a nice sear but careful not to burn them.

I placed the bread on the grill after it had been sliced in half and each inner half drizzled with some extra virgin olive oil that had been infused with garlic.

To Assemble:

Cover the bottom half of the bread with a layer of hard salami, then with a layer of mortadella, then a layer of cheese.  Now add the crowning touch, the grilled veggies.  Slice the big ol' sammich in quarters and share with your family or if you're really brave and sufficiently armed, don't share!  Do enjoy though!


Monday, August 22, 2011

Easy Breakfast Parfait


Don't boo and hiss,  this packed full of flavor and texture!  So anyway, a few weeks ago, I happened to catch the Neely's making this for breakfast.  I've always wanted to try and make my own granola and who knew it could be so easy and so versitile.  Who knew sleepy teenagers would wander in the kitchen early on a Saturday morning asking, "What smells so good? It woke me up."  
Doesn't it look like dessert?  Don't let this parfait fool you, it's fat-free, filling but doesn't bog you down like the usual breakfast fare.
Granola:

3 cups old-fashioned oats
2 cups unsweetened shredded coconut
1 cup chopped dried apricots (quarter each apricot)
1/2 cup coarsely chopped raw pecans or walnuts
1/4 cup brown sugar
3 tablespoons canola oil
3 tablespoons Steen's Pure Cane Syrup or real maple syrup
1 teaspoon pure vanilla extract
1/4 teaspoon Kosher salt

Preheat oven to 325 degrees F.

Toss the oats, coconut, apricots and pecans in a large bowl. In another bowl, whisk together the brown sugar, canola oil, cane or maple syrup, vanilla, and  Kosher salt.  Drizzle the syrup mixture over the oat mixture. Use your hands and toss well, to make sure everything is evenly coated. 

Spread the mixture in an even layer on a rimmed baking sheet. Bake for about 15 minutes, stirring/turning the mixture halfway through so the granola will cook evenly.Remove from the oven and place in a large bowl or storage container so it will stop cooking and allow to cool before serving.

Yogurt:

2 cups plain Greek yogurt
3 tablespoons honey
1/4 teaspoon ground cinnamon

Combine the yogurt, honey, and cinnamon in a bowl.

To Assemble:

Place a spoonful or two in the bottom of a glass then layer with a spoonful or two of the yogurt mixture.

Gorgeous and easy, give it a drive around the block!


Friday, August 19, 2011

Tuscan Chocolate Cream Cake

Are you looking for a dazzling, cool, refreshing, and simple dessert to serve this weekend?  This is the cherry on top of any summer supper.  Boys and girls your eyes are going to roll to the back of your head once your taste buds surround the first bite of Tuscan Chocolate Cream Cake.  Slap me for waiting so long to make this!
The most awesome cake maker I know, my SIL Theresa, shared this recipe with me a few summers ago.

Make the night before are early in the morning so it can chill for several hours before serving.  The only special equipment you will need, is an 8 or 9 inch springform pan.

Tuscan Chocolate Cream Cake

2 cups cold heavy cream
1 -1/2 packages (12 ounces)  Mascarpone cheese 
1/2 cup sugar
1/4 cup  Kahlua coffee liqueur
2 tablespoons cocoa powder
1 teaspoon instant espresso powder
1 teaspoon pure vanilla extract
2  (16 ounce) packages of chocolate chip cookies

Using the whisk attachment on your stand mixer, blend together all of the ingredients except the chocolate chip cookies. To avoid wearing the contents of the bowl, start off on LOW until contents are combined and then gradually raise the speed and whisk until firm peaks form.

Using your UN-greased springform pan, arrange chocolate chip cookies to completely cover the bottom of the springform pan.  You will have to break up several cookies to fit pieces in the spaces between the cookies. Don't worry, you will have about 1/4 of a pack of cookies leftover.

Spread a thin layer (approximately 1/4 of the chocolate cream) of the chocolate cream evenly over the cookies with a spatula.  On this first layer the cookies will tend to move around while you are spreading the chocolate cream.  It may even get a little messy, at this point it doesn't have to be pretty.  Repeat with another layer of cookies followed by a layer of  chocolate cream. until there or four layers.

On the top layer of the chocolate cream, smooth and even out with the spatula.  Cover the cake with plastic wrap and refrigerate overnight or for at least 8 hours so the cake can set.

When you are ready to serve, run sharp night in some hot water and then run the knife between the  outside of the cake and the pan.  Gently remove the side of the pan and slice cake, running the knife in hot water after each slice to achieve a "clean" cut. 


Wednesday, August 17, 2011

Hot Diggity Dog! A Cure for the Summertime Blues!

I'm not going to lie, sometimes I really like a gooooooood hotdog!  Grilled of course!  Buuuuuutttt....I wanted to experiment; that's just a part of the magic of me.

The homegirlz were game once I threw in words they knew, like taco and pizza.

So this is what we did:

The Taco Dog:


We grilled some dogs and flour tortillas.  (Just place the tortillas on the grill for 2 to 3 minutes and turn when you're satisfied with the grill marks and/or doneness.)  We also put an assortment of fixin's; a blend of grated cheddar and Monterrey jack cheeses, diced onions, black olives, jalapenos, sliced green onions, and taco sauce.  Put out whatever you like on a taco.


I slathered on some taco sauce, topped the dog with onions, cheese, black olives, and green onions.


We actually rolled the dogs burrito style.  The flavor was amazing, they were light.  I liked them much better than using a hot dog bun with all the bread. 


About two weeks later, we tried these:

Pizza Dogs:


I infused some butter with garlic and drizzled it on the bun.  We then  placed grilled dogs on the buns and ladled pizza sauce over the dogs and sprinkled a combination of grated Parmesan and mozzarella cheese on top.  The dogs were placed under the broiler until the cheese was sufficiently melted.


The pizza dogs were good, but my favorite no question -  the taco dogs.  The homegirlz concurred.

So when you have the summertime blues or you just want to change things up....go for it, who knows, you may may see Hot Dog Cordon Bleu or Hot Dog Carbonara on here sometime!


So tell me, really, who let the dogs out?


Monday, August 15, 2011

Special Dark Chocolate Cake

Have you ever seen this? I had no idea....

Why oh why did I have to glance around to  check out coffee prices and see this?  It's August for goodness sakes!  It's been hotter than hell, but of course this little container had to jump right in my face.

It as fate, that has to be it, yeah it was meant to be.

Seriously, I'm not a big chocolate freak, but dark chocolate or semi-sweet, the good stuff, oh yeah baby.  Now make a chocolate cake with this...I only managed to get one thin slice,  it was all my conscience could handle.  Actually, once my husband, the homegirlz and their friends got a hold of the cake, my conscience was lucky.  My taste buds threw a parade. 

It's simple, just make this cake.

Cake Batter:

1 stick butter

4 ounces unsweetened chocolate, chopped into small pieces

2-1/2 cups AP flour

2-1/4 cups granulated sugar

1 cup unsweetened Hershey's Special Dark cocoa powder

2 teaspoons baking soda

1/2 teaspoon baking powder

1-1/2 teaspoons salt

1-1/2 cups sour cream

3 eggs, room temperature

2 teaspoons vanilla extract

1 cup water

Preheat oven to 350 degrees. Grease and flour cake pans, I used a Bundt pan.


Melt butter and chocolate together in microwave on HIGH until melted and smooth, 1 to 1-1/2 minutes, stirring at 30 to 45 seconds or halfway through. Remove melted chocolate from the microwave and reserve. 

In another bowl, mix flour, sugar, cocoa, baking soda, baking powder, and salt until thoroughly blended.

Add sour cream, eggs, water, chocolate mixture and vanilla; to the flour mixture and beat 30 seconds on low speed, until dry ingredients are combined then beat for 2 more minutes. Pour into prepared pan(s).

Bake at 350 degrees for 40 minutes or until  a toothpick inserted in the center comes out clean.

Cool cake in pan on rack  for 15 minutes. Remove cake from pan and finish cooling on a rack.


I wish I was a better photographer!

Icing:

4 ounces unsweetened chocolate, chopped up in small pieces

1/2 cup shortening

1 stick butter, room temperature

1/4 cup sour cream

1/3 cup milk

2 teaspoons vanilla extract

1/4 teaspoon salt

4 cups confectioner's sugar

1/2 cup unsweetened special dark cocoa


Melt chocolate in the microwave for about 1 to 1=1/2 minutes, stirring halfway through.  Stir until smooth and set aside.


Beat shortening, butter mil, vanilla, salt, 1 cup of the sugar and the cocoa powder in a medium size bowl until creamy.  Gradually add in the remaining sugar and melted chocolate alternately and beat until thick and smooth.


It's going to be a great week!


Friday, August 12, 2011

Corn, Corn and More Corn Casserole!

I had printed this Paula Deen recipe out a couple of years ago and found it while I was looking for something else.  Always on a quest to add new life to staples sides like corn, this is a keeper.  The corn lovers at your table won't be able to get enough.

1 (15 1/4-ounce) can whole kernel corn, drained
1 (14 3/4-ounce) can cream-style corn
1 (8-ounce) package corn muffin mix (I used Jiffy)
1 cup light sour cream
1 teaspoon finely chopped jalapenos (optional)
1/2 stick butter, melted
1-1/2 cups shredded cheddar cheese

Preheat oven to 375 degrees F.
In a large bowl, mix together the 2 cans of corn, the corn muffin mix, sour cream, and melted butter. Pour into a large casserole dish prepared with non-stick cooking spray.


Bake for 40 to 45 minutes, or until golden brown.

Yum, it smelled like popcorn when it came out of the oven!


Remove from oven and top with Cheddar. Return to oven for 5 to 10 minutes, or until cheese is melted and slightly bubbly. Let casserole rest for 5 minutes and then serve warm.

Enjoy your weekend!

Wednesday, August 10, 2011

Orange Chicken Fingers with Orange Teriyaki Glaze

The Homegirlz have been asking me to make Chicken Nuggets and I just wasn't in the mood to fry anything.   I was in the mood for some good crunchy chicken though.  Even grown kids like me enjoy chicken nuggets or chicken strips from time to time.  This is the result of Kaitlin and me experimenting in the kitchen and learning that compromise is good and figuring out how to make some good crunchy chicken a little less fattening, a lot more healthy and not lose a bit of flavor.

Chicken Fingers:

1 tablespoon toasted sesame seeds - or toast your own (see below)
6 cups corn flake cereal
1/2 teaspoon grated orange zest
Kosher salt and freshly ground black pepper
2 egg whites
1 tablespoon teriyaki sauce
2 lbs. boneless, skinless chicken breasts, cut into tenders

Orange Teriyaki Glaze:

1/2 cup orange marmalade
1 tablespoon teriyaki sauce
1/2 teaspoon ground ginger
1 tablespoon freshly squeezed lemon juice

Preheat the oven to 425 degrees F. Place a wire rack on a baking sheet and lightly mist with nonstick cooking spray.
Toast the sesame seeds in a small nonstick skillet set over medium heat. Toast, tossing them around the skillet often, until golden brown and fragrant, about 5 minutes. Set aside to cool.
Put the corn flake cereal in a re-sealable plastic bag and crumble using a rolling pin until crushed.


In a shallow bowl combine the toasted sesame seeds, crushed cereal and orange zest and lightly season with salt and pepper.


In a second shallow dish, beat the egg whites with the teriyaki sauce.


Dip each chicken tender in the teriyaki-egg mixture and then the cereal mixture, pressing to coat well. Place the chicken on the rack and mist the chicken with nonstick cooking spray. Bake until the crust is golden and the chicken is cooked through, 18 to 20 minutes.


In a small pan, heat the marmalade, teriyaki and ginger over medium heat until melted and thoroughly blended.


Remove from heat and stir in the lemon juice. Serve the chicken with some of the sauce for dipping.


You'll feel good about enjoying this meal with your kids.


Monday, August 8, 2011

Potato Souffle

By chance last week, I happened to catch Sandra Lee making this dish.  Normally, I don't pay a whole lot of attention, but when she was using Parmesan cheese in this recipe, she got my undivided attention.

Have you ever "souffled"?  Me either, this is my first time.  Thank you for being here to share this souffle experience.  Are you afraid to souffle?  I was, that's why I haven't made one before.  Now I'm a souffling maniac!  One word of caution, timing is critical with this dish.  The moment it comes out of the oven it needs to be served or yes, the horrible will happen, it will deflate a little.  It will still taste amazing, but the show stopping fluff will be a memory.

If you ever want to impress your dinner guests, with eye candy and flavor, plus saying "souffle" is fun  and it sounds so sophisticated.; this is the golden ticket.

1 tablespoon butter
2 tablespoons grated Parmesan
1 (3.6-ounce) packet instant roasted garlic mashed potatoes, made according to package directions and cooled completely (recommended: Betty Crocker)
4 eggs, separated
3/4 cup cream
1 tablespoon freshly snipped chives
1/2 teaspoon salt
1/4 teaspoon ground black pepper


Preheat oven to 350 degrees F. Butter bottom and sides of a 1 1/2-quart souffle dish. Add Parmesan to dish and roll dish to coat inside (just like preparing a cake pan with butter and flour); set aside.


In medium bowl, stir to combine cooled potatoes, egg yolks, cream, chives, salt and pepper; set aside.


In another medium bowl, use an electric mixer to beat egg whites until stiff peaks form. Careful not to overbeat.


Stir 1/3 of egg whites into potato mixture. Gently fold in remaining egg whites until just incorporated.


Transfer to prepared souffle dish and bake in preheated oven 60 to 65 minutes, or until puffy and golden brown.


Serve immediately.


Now you've souffled, go forth and show-off to all of your friends and family!

Friday, August 5, 2011

New York Strip with Goat Cheese Crumbles

I know that a good steak can stand on its own.  But...sometimes I just feel the need to change things up a bit.   The fresh, tart taste of goat cheese turned these goat cheese crumbles into a fantastic steak dinner my sweetie and I shared.  It's so quick and oh so very simple!

2 tablespoons goat cheese
1/4 cup Italian style bread crumbs
1 teaspoons Herbs de Provence
1-1/2 teaspoons olive oil, divided
2 New York Strip steaks (rib eyes, filet mignon or sirloin cuts will work great too)
Salt and freshly ground black pepper
1/2 cup dry sherry
1 cup beef stock
1 clove garlic, pressed
1/4 cup onions, diced

Preheat oven to 400 degrees F. Line a baking sheet with foil, spray with non stick cooking spray and  set aside.


In a small mixing bowl, crumble goat cheese and combine with bread crumbs, Herbs de Provence, and 1/2 teaspoon of olive oil; set aside.


Add 1 tablespoon olive oil to a large skillet and heat over medium-high heat. Season steaks with salt and pepper place in skillet. Sear 1 to 2 minutes per side just to brown. Top with a pat of butter, remove skillet from heat.  Us e a pair of tons and carefully place steaks on prepared baking sheet.


Top each steak with half of the goat cheese crumbles. Finish cooking steaks in preheated oven for 4 minutes for medium-rare, 6 minutes for medium, and 8 minutes for well done.


Return skillet to the stove and deglaze with sherry.  Scrape the browned bits from the bottom of the skillet.


Add the beef broth, garlic and onions and bring to a boil over medium-high heat. Reduce liquid by half.


Remove steaks from the oven and let sit for about 5 minutes before serving to allow juices to re-distribute.


Serve steaks with the sauce ladled over the top.

So sublime!  Have a wonderful weekend!

Wednesday, August 3, 2011

Broiled Fillet of Flounder in Cajun Shrimp Butter

I found this recipe by my favorite chef, John Folse, tried it and had to share it with you.  When I put the first bite in my mouth, I felt like I was dining at one of the best restaurants in New Orleans, that's just how good this dish is.

Looking at how this recipe is layed out, it is really pretty simple and goes very fast.  Timing is the key with this keeper.  Get your shrimped peeled and the veggies chopped for the Cajun butter sauce first.  Chip up your butter and put it in a bowl and store it in the refrigerator until you are ready for it.  Once you put the flounder in the oven, get started on the Cajun butter.

The flounder, a nice green salad and a glass of wine and you've just treated yourself and that special someone to an unforgettable dining experience!

For the Flounder:

2 Flounder fillets
1/2 cup white wine
1/4 cup of water
1/2 stick of butter, melted
salt and cayenne pepper to taste
paprika for color
2 tablespoons chopped flat leaf parsley

For the Cajun Shrimp Butter:

1/4 cup melted butter
1 lb. fresh shrimp, peeled
2 tablespoons minced garlic
1/4 cup chopped green onions
1/4 cup sliced mushrooms
1/2 cup diced tomatoes
1/2 cup dry white wine
1 tablespoon freshly squeezed lemon juice
1/2 cup heavy whipping cream
1/2 lb. butter chipped
salt and cayenne pepper to taste

Preheat the oven to 375 degrees.


 Use a baking pan large enough to accommodate the fillets.  Pour wine, water and butter over the fillets. Season the fillets to taste with salt, cayenne and sprinkle generously with paprika and parsley.  Bake for about 10 minutes, until fish is flaky to touch.  Heat broiler and place fish under broiler for about 1 to 1-/2 minutes, just to brown up the seasonings on top just a bit.  Be careful not to burn or overcook the fish. 


Remove from oven, tent with foil to keep warm.


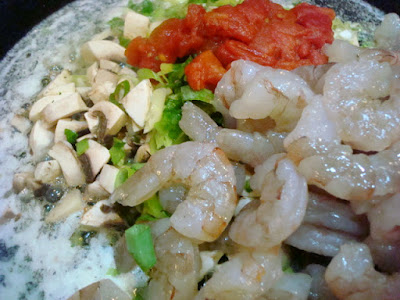
In a heavy skillet, heat butter over medium high heat, add shrimp, green onions, mushrooms, tomato and garlic and saute for about 7 minutes, until vegetable are wilted.


De-glaze the skillet with the white wine and lemon juice and reduce by half.


Add heavy whipping cream and bring to a low boil and reduce until thickened.


Slowly add the chipped butter a few pieces at a time.  Swirl until complete melted before adding more chips of butter. 


Season to taste with salt and cayenne.


Place a generous serving of Cajun butter in the center of plate and top with broiled flounder.


I hear ya, even this early in the morning I'm still drooling!