Wednesday, September 30, 2009

Shitake and Miso Soup


Do you see this child over here to the left? The one in the white jersey, number sixteen. She doesn't like soup. Seriously, where did she come from? That's like saying I don't like cookies, cake, ice cream. There are just too many kinds of each to make such a broad statement as this.
(For the soccer fans, Lauren was fouled, got a penalty kick and got the point.)
I've seen miso featured on one or two blogs that i read. It's so mysterious, I didn't know what it was. I looked it up, simply put, it's fermented soybeans. When i was offered the opportunity from Foodbuzz to order from Asian Food Grocer, I had to order miso and see if it was something i would like and would be able to use in my cooking.
The answer is "yes" and "yes".
The tub of miso I received, had the consistency and color of peanut butter. It had a sesame/salty taste. Being a salt fan and also loving Asian flavors, I could eat this as a dip. I did have to figure out what I was going to do with the miso. How was I going to make it a star?
Tyler Florence had a recipe for a Shitake and Miso Soup. A few of the ingredients he listed, I hadn't heard of and some others I knew I was going to find at the local grocery store. Here is how I adapted his recipe to fit the ingredients I had on hand.
This wound up being a very hearty and flavorful soup. I have a huge container in the freezer and can't wait to heat it up and enjoy this soup again.

The major players, 8 ounce tub of miso, Oriental Style Noodles (wait until you read about these), Dried Shitake mushrooms and pungent minced garlic.

1 bunch scallions, sliced thin, white and green parts separated
1/2 teaspoon powdered ginger
1/4 teaspoon crushed red pepper flakes
3 teaspoons minced garlic
2 tablespoons toasted sesame oil
8 cups water
1 ounce dried shitake mushrooms
1 cup miso
1 pound Oriental Style Noodles

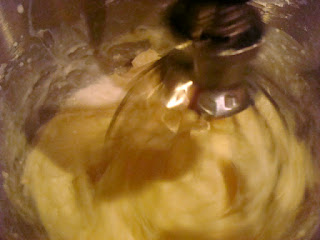
In a large soup pot over medium heat add the scallion white parts, ginger, garlic, and sesame oil.
Cook for a minute or two.
Add 8 cups water. Bring it to a simmer and cook for 10 minutes - do not let it boil.
Add the crushed red pepper flakes, dried mushrooms and miso to the pot and let it simmer gently for 10 to 15 minutes, or until the mushrooms are hydrated and tender.
These noodles ~sigh~, they are amazing. I know we're not supposed to say "Oriental" anymore, but it's written on the package. These are described on the Asian Food Grocer site as Orchid noodles. How could I not order these? The noodles do not have a strong flavor, but they have a certain "something, something" that I really like.
Add the noodles simmer until it is tender, about 15 minutes.
Ladle into bowls and garnish with the reserved green parts of scallions.


Tuesday, September 29, 2009

Spatchcocked Chicken

Have I ever mentioned that I am a total klutz with a knife when it comes to cutting up chicken? I am beyond help and I can accept this. I just hope as you go through this post, you are patient and don't shake your head.
Pam over at Sidewalk Shoes has been raving how much she's fallen in love with Spatchcocked Chicken. I knew I just had to try this.

Using a whole chicken, wash the chicken inside and out. Pat the chicken dry with paper towels. Using a sharp knife, remove the back bone from the chicken. This picture doesn't show my sins. The backbone was removed, but i got sloppy with the knife, you'll see. The chicken will lay out flat as shown. Coat the chicken on both sides with olive oil and liberally season with your favorite seasoning blend. I used Emeril's Chicken Rub.
Place the chicken on a pre-heated grill over medium high heat and cook for about 15 minutes per side until thoroughly cooked. See, I'm stilling hiding my sins.
My sins can no longer hide. I started cutting too close to the thigh, but I know better now. The chicken may not be so pretty but still tasted great. This can be cooked in a roasting pan in the oven. The variety of flavors that can be used are infinite...just set your imagination free and enjoy!

Monday, September 28, 2009

Savory, Cheesy Cornbread


These muffins really appeal to me. One, because of the onions, two, the seasonings and three, the glorious cheese! They are perfect with a hearty bowl of chili, a healthy serving of beef stew or with your favorite soup. These muffins are so easy to prepare and are packed full of flavor. Give them a try tonight!


Saute, 1/2 of a medium sized onion, sliced thin a 1 tablespoon of olive oil and one tablespoon of butter.
Once the onions have turned golden brown. Remove from pan and set aside momentarily.


Empty one package of Jiffy Corn Muffin mix (don't judge me - this is good stuff and I'll take all the help I can get) into a mixing bowl, along with the onions, 1 cup of shredded sharp cheddar cheese (pepper jack cheese would totally rock here too) and 1-1/2 tablespoons of Emeril's Essence, 1/3 cup of butter milk (or regular milk) and 1 egg. You can change things up and use your seasoning of choice. A good garlic bread seasoning would be awesome too!


Thoroughly combine all of the ingredients and allow the batter to rest for 3 or 4 minutes. Spoon the batter into each muffin cup to 3/4 full. Top with a little more shredded cheese and bake in a preheated 400 degree oven for 12 to 15 minutes.


One the muffins have turned golden brown and the cheese has melted, remove from oven and allow to cool for about five minutes. Feast your eyes on these!


Don't tell anyone, but I never wait out the five minute waiting time.


Saturday, September 26, 2009

What Happens When I'm not Home

Last Saturday night I played Bunco with a group of ladies in my neighborhood. A.J. was in charge of dinner. I suggested he order a pizza and make it easy on himself.

But let me back up a little here. We had a somewhat tense day. The girls are allergic to chores and addicted to texting...I have cleaning OCD on Saturdays and their dad can't stand the incessant texting or hearing me fussing...a recipe for...total meltdown. We avoided the total meltdown, but I was still a tad bit edgy when I left.

As I was strolling out of the door, I could hear them tell A.J. what time they wanted to eat and all of the things they would not eat. Oh yeah, I knew I was really going to enjoy my evening with those last few sentences rolling around in my head for the next few hours.

When I arrived back home with a few extra bucks in my pocket, I tied for second place, all was quiet in our home. Maybe a little bit too quiet.

The family room was still neat and the kitchen was immaculate. Kaitlin was in the kitchen serving herself a bowl of ice cream. Oh my goodness, they didn't eat and it's 10:00 PM!

They ate, and Kaitlin photographed it because she thought it was "blog worthy". "You see, Mom, we can eat more than tacos when you're not here. Look, I took a picture with your camera. Do you want to see it? You need to put this on your blog. Don't I take good pictures?"


Fried chicken tenders from Food City (our local grocer), Bob Evans mashed potatoes, canned green beans and Kaitlin made the gravy all by herself and she said it totally rocked!

I guess my work here is done.


Thursday, September 24, 2009

Egg Flower Soup

Through the Tastemakers program at Foodbuzz, I was offered some merchandise from Asian Food Grocer. Asian Food Grocer is one amazing website! I have a strong fondness for Asian cooking and Asian food, so you can imagine my eyes got big and I felt just like the proverbial kid in a candy store. So many exotic products that I drool over when I see them on your blogs but can never find locally. Asian Food Grocer is the answer to my Asian cooking prayers!


Besides the exotic, they carry a wide array of pantry staples at very reasonable prices. Each and every item I ordered was neatly packaged and delivered in a matter of days. Go check out Asian Grocers, I bet you'll add them to your Favorites.


With cooler weather on the horizon, my craving for soup is calling.


Egg Flower Soup sounded and looked very appetizing, I had to get a pack. Talk about fresh tasting and easy to prepare! Less than 15 minutes and you're done. Serves three


Pour the contents of the envelope into a medium sized pot. This is just too easy, even the homegirlz can manage this.

Whisk in water, I think it was 2 cups. I really don't remember, but the package tells you how much, so it's all good. Once everything is thoroughly combined, let it come up to a boil.


While you're waiting on the water to boil, whisk one egg and set aside.


Once the water comes to a boil lower the heat and let it bubble for 5 minutes, then add the egg and stir in ONE direction. This is very important for the authentically cool Asian egg effect.


Doesn't it look like you're at your favorite Asian restaurant?


Now you can sit back and watch the New Orleans Saints stomp all over who ever they are playing this week or curl up with your favorite movie, because you just made takeout at home!


Wednesday, September 23, 2009

Shrimp Etouffe

The French word "etouffee" means to stew, smother or braise. This technique is found in dishes using shrimp, crab, crawfish and, in some cases, meat or game. Though more Creole in origin, etouffees are found throughout Cajun country. ~John Folse~
Any time I say, "I think I'm in the mood for etouffee.", people that usually can't hear me yell, "Feed the dog!", come running from who knows where to ask with big blinking eyes if I need any help, can they get me a cold beverage or would I be interested in a neck massage.
Yes, the word, "etouffee", is magical, it's mysterious, but what really counts, it rocks your taste buds baby and that's with a capital R!
Some of you are scared of crawfish or turn your nose up at them. If you live in my part of the country, they just ain't that easy or economical to get. So when your husband drives in from New Orleans and has forgotten to get crawfish, you can always use shrimp.
This recipe is adapted from Chef John Folse's History of Creole Cooking

INGREDIENTS:

2 pounds peeled and de-veined shrimp (set shrimp shells aside)
1/4 pound butter
1 cup onion, chopped
1/2 cup celery, chopped
½ cup green bell pepper, chopped
½ cup red bell pepper, chopped
½ cup tomatoes, diced
2 tbsps garlic, diced
2 bay leaves
1/2 cup tomato sauce
1 cup flour
2 quarts shrimp stock or water (recipe below)
1 ounce sherry
1 cup green onions, chopped
½ cup parsley, chopped
salt and cayenne pepper to taste
Louisiana Hot Sauce
2 cups white rice, steamed
DIRECTIONS:

In a 2-gallon stock pot, melt butter over medium-high heat. Add onion, celery, bell peppers, tomatoes, garlic and bay leaves. Sauté until vegetables are wilted, approximately 3-5 minutes. Add tomato sauce and blend well into mixture. Using a wire whip, blend flour into the vegetable mixture to form a white roux. Slowly add shrimp stock and water, a little at a time, until sauce consistency is achieved. I strongly recommend using half stick and half water. Using all stock makes the sauce to thick and pasty and it will stick tot he bottom of your pot and burn. Continue adding more stock/water as necessary to retain consistency. Bring to a rolling boil, reduce to simmer and cook 15 minutes, stirring occasionally. Add shrimp, cook another 15 minutes and continue stirring occasionally. Add sherry, green onions and parsley and cook an additional 5 minutes. Season to taste using salt and cayenne pepper. Serve over steamed white rice using a few dashes of Louisiana Gold Pepper Sauce.

SHRIMP STOCK:
In a large stock pot add 1 gallon of water, season water with 4 tablespoons of Zatarain's powdered crab boil or 4 tablespoons of Zatarain's Creole Seasoning. If you don't have either of these, mix together in a bowl, 1 tablespoon Lawry's Seasons Salt, 1 tablespoon black pepper, 1/2 tablespoon paprika, 2 teaspoons cayenne, 2 teaspoons garlic powder, 2 teaspoons onion powder.
Slice one lemon in half, squeeze the juice into the water and throw the squeezed lemons halves into the water. Slice a head of garlic in half (at the equator) and add to water un peeled and unseparated, and 2 bay leafs.
Bring water to a boil and add the shrimp shells (and shrimp heads too if you have them). Return water to a boil. Lower heat to medium-high and let it bubble for 30 minutes. Remove from heat and let the pot sit for 30 minutes. Strain and you'll have a real good seafood stock.
Place the leftover stock in ice trays, freeze, place cubes in a re-sealable plastic bag and you'll have seafood stock in small portions when ever you need it.

Laissez les bons temps rouler ya'll!

Tuesday, September 22, 2009

Grilled French Fries

Since I've been neglecting my blogging lately due to being very busy at work and soccer in the evenings, I spent some time this past weekend scheduling posts and trying to get my groove back with blogging and commenting.

While visiting my favorite blogs today, My Year on the Grill spotlighted this blog. To tell you I'm very honored and flattered, just doesn't seem to really express how humbled I am by his post today. Thank you much for your kindness. Go visit My Year on the Grill, your going to find so many wonderful recipes (I'm still swooning over the Bacon Wrapped Potato Boats with Goat Cheese and Asparagus. Ok, since I have your attention, Grill also noticed that this is my 300th post. I didn't even realize this, I mean once my shoes are off and I get to 20, it starts getting confusing. So I had to come back to this post and edit it to thank My Year on the Grill. your kind words mean a lot to me. Also, I wanted to say, "Whoo-Hoo 300!".

I don't look 300 do I? Don't answer that!

Grilled French Fries -

You know sometimes you just want a side dish that is comforting and doesn't take a lot of thought. Sometimes you just dive in head first and let the crumbs fall where they may. Sometimes I just don't want to turn on the oven or the stove.


This particular day, I cooked everything on A.J's grill (he was in the Big Sleazy visiting his Mom), meat, starch and veggies.


To be honest, the potatoes don't make a mess on the grill. These are just the ticket! And guess what? Since cooler weather is approaching you can bake these in the oven. We tried it when I was all set to grill and it rained on my parade.


Estimate one potato per person. You'll have more than you need. Wash the potatoes, cut them in half and boil them for about 10 minutes. Drain and cool. Cut each half into 4 slices (leave the skin on, it gives them character).


Place slices into a bowl and liberally season them with Emeril's Essence or your favorite seasoning blend. Drizzle a little vegetable or canola oil over the potatoes and toss the potatoes with your hands to evenly coat with oil and seasonings.


Place the potato slices on the grill over medium-high heat. (If you use the oven, preheat your oven to 425 degrees F and bake for 20 to 25 minutes, turning halfway through).


Turn after 7 minutes and cook another 7 minutes and serve. It's not your average side and it's some simple you can't help but try it!


Monday, September 21, 2009

Grilled Polish Mustard Chops


Last month I posted one of my favorite recipes, Honey Mustard Pork Chops. My good friend Buffalodick, from Opinions and Rectums, We All Got One commented that I should try a certain Polish Mustard that is one of his favorites. Buff was kind enough to send me a jar. I heart this Polish mustard! Thank you Buff for broadening my horizons!


Pork chops with mustard, what can I say...let me show you.


Make a mustard sauce with 2 tablespoons of Dudek Polish Deli Mustard, 1/4 cup of white wine and juice from half of a lemon. Whisk together and set aside. Place your unseasoned pork chops, boneless, bone-in, whatever you want on a hot grill. That's right, don't season them. Sear 3 minutes per side, move to indirect heat and slather on the mustard sauce.


Cook for about 10 minutes, flip and slather the other side and cook for 10 more minutes. Flip and cook until done. I know, you see the French Fries on the grill. I'll show you that tomorrow if you want. Don't judge me...if I can dirty A.J.'s grill instead of my kitchen, it's all good.


If I give you a pork chop, will you clean the grill for me?


The homegirlz and I give Buff's Polish Deli Mustard our seal of approval.

Thanks Buff!


Sunday, September 20, 2009

Pineapple Almond Cake


I was fortunate enough to happen upon this cake at Donna's blog, My Tasty Treasures and again on Gigi's blog, Afterthoughts and I knew I just had to make it. This cake without a doubt has to be one of the best cakes I've ever made. It's moist, delicious and the cream cheese icing...moans and groans with every bite.
I didn't quite have all of the ingredients in the original recipe and had to improvise with what I had on hand, plus I added a little something here and there.
This cake was also the perfect opportunity for me to introduce to you Singing Dog Organic Pure Vanilla Extract. Jennifer from Singing Dog sent a sample to me and now I'm hooked. Visit their website; Singing Dog has a wide array of organic products from coffee to vanilla paste.
The recipe called for 1 cup of pecans. I'm out of pecans right now so I decided to toast 1 cup almonds...pineapple, almonds they go together right?

Toast the almonds and while they are toasting, in a large bowl, mix together 2 cups of flour, 2 cups of sugar and 2 teaspoons of baking soda. Add in 2 eggs and one 20 ounce can of crushed pineapple with the juice and 1 teaspoons of vanilla extract. Stir until moistened then fold in the toasted almonds. Pour into a greased 9 x 13 baking pan.
Bake in a preheated 350 degree oven for 30 to 35 minutes. Allow to cool completely before icing.
Icing:
1 stick butter, softened
1 8oz cream cheese softened
2 cups confectioners sugar
1 tablespoon vanilla
Be prepared for ungodly deliciousness!

Combine cream cheese, butter, confectioners sugar, and vanilla. Beat until smooth. Use all of the frosting.
This part is very important: Make the icing when you're home alone...I'm serious, you won't want to share the spatula with anyone! You will wig out when you sink you teeth into a piece of this cake!