Thursday, December 22, 2011

Pork Tenderloin with Roasted Garlic Drizzle


For some reason I've been in a roasted garlic mood.  I think I just love the way it makes my house smell.  Most people Febreeze themselves silly, I'm silly and roast garlic.  That's just how I'm rolling these days!

If you're looking for a fantastic and easy dish to serve during the holidays, this is the ticket!

First, roast 2 heads of garlic  You'll need two heads of garlic, some olive oil, salt and pepper.  After you remove the garlic from the oven, allow it to cool long enough so you can handle it comfortably.

Pre-heat the oven to 450 degrees F.

Pork Tenderloin:

1 boneless pork tenderloin
Kosher salt
Freshly ground black pepper

Season the tenderloin evenly on all sides with salt and pepper.  Place the tenderloin in a a medium size roasting pan and roast in a pre-heated 450 degree F oven until a meat thermometer reads 140 to 145 degrees, approximately 35 to 45 minutes. Remove the pan from the oven, cover with foil and allow to rest for about 15 minutes.


Roasted Garlic Drizzle:

1/4 cup chopped fresh flat leaf parsley
1/2 cup balsamic vinegar
3/4 cup extra virgin olive oil
1 teaspoon sugar
1 teaspoon salt
1/2 teaspoon freshly ground black pepper
2 tablespoons water

Squeeze the roasted garlic cloves in a blender.  Add the parsley and balsamic vinegar and pulse until thoroughly combined. Drizzle the olive oil into the blender while it is running, then add the sugar, salt, pepper, and water and blend until blended.
Remove the foil and transfer the pork tenderloin to a serving platter and slice.  Drizzle some of  the garlic/balsamic drizzle over the pork and save some in a small bowl to pass around at the table for dipping.

Tip:  Garlic bread tastes divine dipped into the roasted garlic/balsamic drizzle.

Enjoy!


Tuesday, December 20, 2011

Double-Dare You Chocolate Cheese Cake

Cheesecake just isn't rich and fattening enough, it just needed chocolate and lots of it!  It's Christmas time, so the richer the better, right?  That's what I thought. Now go get your drawstring roomy pants, I'll wait and then we'll make this ridiculously fantastic, chocolaty, chocolate cheesecake.
Look at it like this, this decadent dessert requires a few steps, so I'm thinking maybe, just maybe a few calories are burned in the process which negate the calories you may intake while munching.  Plus the smile and the eye rolling are good for burning a few calories too.  Just sayin'....
This recipe supposedly made one 9-inch cheesecake, but it actually made more.  Instead of using my 9-inch springform pan, I used my 6-inch and 8-inch springform pans and gave one to a neighbor who looked like she needed a lot of chocolate happiness.

Crust:
Non-stick cooking spray
1 pack chocolate wafer cookies (regular Oreos)
2 tablespoons sugar
1 teaspoon table salt
1 stick butter, melted

Preheat the oven to 350 degrees F.

Spray a 9-inch-diameter (or one 8-inch and one 6-inch) springform pan with cooking spray.


Grind the cookies in the food processor until finely ground, then pulse in the sugar and salt. Pour in the melted butter and pulse until completely blended.  It will look like wet coffee grounds. Press the mixture evenly on the bottom of the prepared pan. Do not press the crust up the sides of the pan.

Bake at 350 degrees for 7 to 10 minutes to set the crust. Set aside and allow it to cool.

Filling:

8 ounces bittersweet chocolate, chopped
4 ounces of German chocolate, chopped
1-1/2 cups sugar
1/3 cup cocoa powder
4 (8-ounce) packages of room temperature cream cheese
2 teaspoons espresso powder (1/2 tablespoon prepared coffee, cooled)
4 eggs


Place the chocolate in a microwave-safe bowl and heat until melted, 2 to 3 minutes, stirring every 45 seconds until the chocolate is completely melted. Set aside to cool slightly.

In another bowl, sift the sugar and cocoa powder together.

In a stand mixer, beat the cream cheese until light and fluffy, about 3 minutes.  Lower the speed to lowest setting and carefully add the sugar/cocoa powder mixture. Add the espresso powder and beat over medium speed until fully incorporated.  Scrap down the sides and the bottom of the mixing bowl as necessary.  Now add the eggs, one at a time.  Remove the bowl from the mixer and fold in the melted chocolate until completely incorporated.


Pour the filling over cooled crust, spread with a spatula to evenly distribute.  Tape the sides of the pan or tap it on the counter to make sure there are no air bubbles.

Bake on the center rack for approximately 70 minutes, rotating at 35 minutes, to just set the center.  The center will jiggle a little bit. 

Allow pan to cool on a rack for about 10 minutes, then run a butter knife around the side of the cheesecake but DO NOT remove the springform from the pan.

Allow cheese cake to cool for about an hour, then cover it with plastic wrap and place it in the refrigerator to chill overnight.

Icing:

3/4 cup heavy cream
4 ounces bittersweet chocolate, chopped
2 ounces semi sweet chocolate, chopped
2 ounces milk chocolate, chopped
2 teaspoons honey
1 tablespoon prepared coffee

Ina medium saucepan over low heat, stir the heavy cream, chopped chocolate, honey and coffee until chocolate is melted and mixture is smooth. Remove from heat and allow to cool slightly.
Ladle the icing over the cheesecake working from the center, out to about 1/2-inch of the edge of the cake.  The icing will fill and cracks.  Place back in the refrigerator for about an hour to set the icing.
Transfer to a serving platter and release springform pan. Garnish with pecans or peppermints, serve cold or at room temperature.
Now aren't you glad I made you change into the comfy loose fitting pants?


Sunday, December 4, 2011

Grilled Shrimp Cocktail


My two brothers and I took off the week before Thanksgiving to finish getting my mom packed and moved up here close to me.  I have found an adorable little three bedroom condo and she and I were very excited, shopping and making plans to decorate. 

Two days after we moved her into her new crib, I stopped by to pick her up to take her to our house for a steak dinner and to watch the LSU anialate another team. 

Instead I wound up taking her to the Emergency room and two weeks later, she's still in the hospital, but (fingers crossed) close to getting released. 

Hoping that my mom will be home for Christmas, I'm trying out some new appetizers for Christmas.  She loves shrimp so I thought grilling the shrimp would be a huge hit instead of boiling them for this version of a shrimp cocktail.   

Grilled Shrimp Cocktail couldn't be easier, quicker or tastier!  When the presents are being handed out, the last place I want to be is in the kitchen!  I want to be in the the middle of the paper and ribbon flying about the premises in shameless, give me, give me fashion!

The day or night before make the cocktail sauce, it takes about 7 minutes:

1-1/4 cups low-fat, plain Greek yogurt
 (If using plain regular yogurt, line a mesh strainer with a paper towel. Place the strainer over an         appropriate size bowl.  Spoon the yogurt into the lined strainer and allow to drain for about 30 minutes).
2 tablespoons mayonnaise
2 tablespoons Creole or spicy brow grain deli mustard
1-1/2 tablespoons real maple syrup
1 teaspoon curry powder
1/4 cup freshly chopped basil leaves

Mix the above ingredients in a small bowl, season with salt and pepper to taste. 

Heat your indoor grill pan to medium high and coat with 2 tablespoons of olive oil or alternately, heat your outdoor grill to medium high.

Peel 1 pound of jumbo shrimp (or the largest shrimp you can find), leaving the last section of shell near the tail and the tail in tact.  De-vein the shrimp.

Place the shrimp in a large bowl and drizzle with extra virgin olive oil.  Season with Kosher salt and black pepper.  Sprinkle with 1 tablespoon of herbes de Provence.  Toss the shrimp with your hands to evenly coat with the oil and seasonings.  Place shrimp on grill and cook approximately two minutes per side.

So you tell me chips and salsa or Grilled Shrimp Cocktail...that's what I thought

Wednesday, November 23, 2011

Happy Thanksgiving!

Hey kids!  I wanted to wish all of you and your families a bountiful, relaxing and warm Thanksgiving.

I've been busy with my brothers helping my my Mom pack and move up here to East Tennessee.  I found an amazing condo for her and we got her all moved in last Thursday.  Unfortunately, Saturday evening when I when I picked her up and bring her to my house for dinner and to watch the LSU vs. Ol' Miss game, I wound up taking her to the emergency room.

We knew my Mom's lung cancer had come back last May and she received radiation treatment on two tumors in her upper left lung.  One shrunk and one didn't.  Evidently her disease is progressing since her oxygen level is low and her carbon dioxide level is high.  She's still in the hospital as her doctor is trying to get her O2 level up and her CO2 level down.  She is progressing, but very slowly. 

So I haven't disappeared and I am making an easy but amazing Thanksgiving dinner.

Also, my oldest homegirl works for American Eagle and over the Christmas Season, AE is hiring friends and family.  My baby homegirl, my oldest homegirl's boyfriend and I are working Black Friday.  Yikes!  But, I could pass up a once in a lifetime opportunity to work along side my babies even if one of them will be my boss!  We are working tomorrow evening from 8:45 PM until 5:00 AM Friday morning. 

Love and hugs to all of you! 


Friday, November 11, 2011

Spicy, Crunchy Tailgatin' Wings

One of the many things I look forward to in the fall is football season.  Friday night lights, college, or pro; it's all good.  Besides walking out of the stadium celebrating because your team was beasting it up, the pre-game hype or tailgating before the game is my favorite.  Socializing with friends and making new friends, ribbing your fellow tailgaters who are sporting the colors of the opposing team revs up the excitement. 

Then there's the food, it's all about the food.  Oh yeah, we all pass up the salsa and chips, the veggie tray and knock people over to elbow our way to the buffalo wings because they are the bomb, but spicy, well-seasoned, crunchy wings totally rock!  Serve a bold dipping sauce on the side and you totally score!

Well football season is far from over so don't you dare skimp on any of the spices!  I know, I know, you're shaking and thinking WOW!  These wings have a subtle, pleasant BAM!  I promise these wings will not set your tongue and internal organs on fire.  I promise you will be able to enjoy the flavor and not just taste fire. 

Get Your Crunch On:

1 tablespoon Lawry's Seasoning Salt
2 tablespoons crushed red pepper flakes, divided
3 teaspoons freshly ground black pepper, divided
3 teaspoons cayenne pepper, divided
2 teaspoons poultry seasoning
1 teaspoon lemon-pepper
2-1/2 lbs. (2 packs) chicken drummettes or whole wings cut at the joint, toss the little end section
2 eggs
2 tablespoons Louisiana Hot Sauce or Frank's Hot Sauce
1-1/2 cups AP flour
Canola or vegetable oil for frying


Whisk together the seasoning salt, 1 tablespoon red pepper flakes, 2 teaspoons black pepper, 2 teaspoons cayenne pepper, poultry seasoning, and lemon pepper. Remove about 2 tablespoons of the seasoning and set aside for later.


Place the chicken in a large baking dish (don't use metal).   Season the wings evenly with the seasoning.  Cover dish with plastic wrap and let them chill in the refrigerator for at least 1 hour but no more than 2 hours.


Remove the chicken from the refrigerator, uncover and let them sit out for about 15 minutes.  While the chicken is sitting out, in a large shallow dish, whisk the eggs, hot sauce, the remaining red pepper flakes, black pepper, and cayenne pepper.   Place the flour in another shallow dish.

Fill cast iron skillet halfway with oil and heat over medium heat to 350 degrees or alternately use a deep fryer.

Coat the chicken with the egg batter then dredge through the flour. Carefully place a few pieces at a time into the hot oil.  Be careful not to crowd the skillet.  Fry until golden brown, turning about every 3 to four minutes.  Place the cooked wings on a paper towel lined platter.  Sprinkle with the reserved seasoning immediately after placing the cooked chicken on the platter.  Then continue on cooking the chicken in batches.


If you like to dip, here a fantastic dipping sauce to serve along with your wings:

1 cup light or low-fat sour cream (don't use fat-free)
2 tablespoons prepared horseradish
1 tablespoon chili sauce
1/4 teaspoon cayenne pepper
Kosher salt freshly ground black pepper

Whisk everything together and serve along side your wings.


Save the trees, use less paper napkins!


Wednesday, November 9, 2011

Cane Syrup Glazed Acorn Squash

The first time either A.J. or I had acorn squash was last fall.  I saw the Neely's prepare this with maple syrup and thought I was game to try it.  I don't know why I haven't blogged this before because in the fall we have this just about every Saturday night.  I don't know why neither of our mothers ever made this either.  More things to ask my mom, "Why?"

This one of the easiest sides to make and if this is really a vegetable, which I have my doubts, your picky eaters will think you've lost your marbles and are feeding them dessert.

I've made this using Steen's Cane Syrup which is what I grew up on in New Orleans and I think you can buy it online, and I've made this once with real maple syrup which is kind of pricey.  We like the cane syrup better but it has a deeper and richer flavor and more body.  I bet you could even use a half and half combination of dark corn syrup and molasses if you have them in your pantry.

2 tablespoons extra virgin olive oil
2 tablespoons light  brown sugar
2 tablespoons real maple syrup
2 small acorn squash, cut in half, seeds removed
Kosher salt and freshly ground black pepper
Butter, for topping (optional)

Preheat the oven to 425 degrees F.

Mix the olive oil, brown sugar, and cane syrup (or maple syrup) together in a small bowl. Put the acorn squash, cut side up, in a single layer on a baking sheet. Brush the glaze on the flesh of the squash and season with salt, and pepper, to taste.

Put the squash in the oven and roast it until tender and golden brown, about 40 to 45 minutes. Remove the squash from the oven and transfer it to a serving dish. (Option, top with butter and serve.)

The combination of the savory and sweet is a winner! 


Sunday, November 6, 2011

Caramelized Onion and Apple Tarts with Gruyere

Two words that can stop me in my tracks are "Caramelized Onions".  Then add some melted cheese and slap a flaky, buttery piece of puff pastry under it, you've just become my new best friend. 

If you're looking for a special appetizer to completely blow away your friends and family, you have found it!  I was given a sample of one of these little pillows of all that is good at a gourmet cooking gadget store last weekend.  We were told this was one of their sales associates' creations and they were giving out copies of the recipe with no name on the paper, just the words, The Slanted Door.  So I couldn't wait to make these babies for our little LSU/Alabama football get together last night.  They were a huge hit, even with the teenage picky eaters.  You can bet they will be on the menu for Thanksgiving!

2 tablespoons olive oil
3 medium sized sweet yellow onions, halved and thinly sliced
Kosher salt and freshly ground black pepper 
2 tablespoons butter
2 tart apples, peeled, cored and sliced thin
1 teaspoon granulated sugar
2 cups  shredded Gruyère cheese
2 tablespoons minced scallions
1 teaspoon chopped fresh thyme
1 package frozen puff pastry dough, thawed
1 egg, beaten
2 tablespoons water


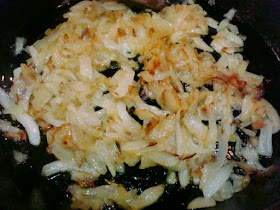
In a large skillet over medium heat, warm up the oil. Add the onions and sprinkle with about 1 teaspoon salt and saute, stirring occasionally, until the onions begin to carmelize, about 20-25 minutes. Transfer to a large bowl and aloow the onions to cool.

Place your oven racks, one in the upper third and the other in the lower third of an oven.  Preheaoven to 400 degrees F.  Line 2 baking sheets with parchment paper.

In the same skillet over medium heat, melt the butter. Add the apples and sprinkle with the sugar and stir to coat the apples. Saute, stirring, until the apples are just starting to caramelize and have softened, about 10 minutes.


Transfer to the bowl with the onions and stir in the cheese, chives, thyme and a dash of pepper.


Cut the puff pastry into 2-inch squares and place on the prepared baking sheets.  Space the squares about 1 inch apart. I used a flutes pastry cutter, thinking the pastry would look really pretty once it was baked. When it was all said and done, the edges were smooth, but it helped me cut them evenly.


Slightly beat the egg and blendin the 2 tablespoons of water.  Brush the egg mixture on each pastry square.


Place 1 heaping tablespoon of the filling in the center of each square. Season with salt and pepper.
Bake, rotating the baking sheets from top to bottom and front to back halfway through baking, until the pastry is crisp underneath and golden brown on top, about 25 minutes. When you rotate the pans, the pastry make seem to deflate a little bit, but don't worry, your tarts will be just fine.


Transfer the baking sheets to wire racks and let the tarts cool to room temperature. Serve at room temperature.


Go make these.  Try them before Thanksgiving, it's important.


Friday, October 28, 2011

Beefy Cajun Mac

I came across this recipe recently and found out this is the pre-game meal of choice of Drew Brees, quarterback of the New Orleans Saints.  The Ritz-Carlton in New Orleans got on the bandwagon very quickly fashioned this recipe and added it to their tailgate menu on game day Sundays.

This once ordinary throwback from the 70's is now supercharged and comes together in a snap.  You will get two thumbs up for sure from your athletes who need to carb-load before a big game.

Beefy Cajun Mac

1 tablespoon butter

1 cup chopped andouille
1-1/2 pounds lean ground beef
1 tablespoon flour
1-1/2 cups heavy cream
2 teaspoons Worcestershire Sauce
1 cup chopped tomatoes
1 tablespoon chopped jalapeños
3/4 teaspoon salt
1/4 teaspoon pepper
1 1/2 cups shredded sharp cheddar cheese (plus extra for topping)
3/4 cup uncooked macaroni or pasta of your choice, cooked and drained


Melt the butter in a hot skillet, add andouille and sauté.


Once the andouille is crispy, add ground beef. Break up the ground beef, and cook until the beef is done all the way through.


Stir in flour until smooth.


Add heavy cream...


...and Worcestershire sauce. Simmer until mixture thickens.


Add tomatoes, jalapeños, salt, pepper and cheese. Cook until cheese is melted, stirring slowly (about 2 minutes


Mix the cheese sauce with the cooked pasta, and place into a well-greased oven safe dish.


Top with a layer of shredded cheddar and bake for 7 minutes or more at 375 degrees, until dish is heated through and cheese is golden brown.


After eating this pre-game favorite, last Sunday Drew Brees threw 31 for 35 and don't forget he threw more touchdown passes in one game than he threw incomplete passes (5 touchdowns, 4 incompletes). Doesn't your mind just race wondering what you can accomplish?


Have a beautiful weekend!


Wednesday, October 19, 2011

Corn Chowder


I don't know how the weather is in your neck of the woods, but here in East Tennessee, it's cold and rainy, downright miserable.  I should be curled up with a good book or a good movie!

Did I ever tell you that when I first met my husband the only "vegetable" he would eat was corn?  Well A.J. now knows corn is not a vegetable, plus he has many new favorite real vegetables.  I now know if I serve ANYTHING with the word "corn" in it, he's the first one at the table when dinner is ready.  So from here on out, every recipe, be it salad or brownies is going to be called "corn" something or other...nah, that's just plain boring.

Well, let me tell you that this soup is anything but boring!

4 strips hickory smoked bacon
1 tablespoon butter

Extra-virgin olive oil
1 onion, chopped
3 garlic cloves, minced
1/4 cup all-purpose flour
6 cups of chicken or vegetable stock
2 cups heavy cream
3 Yukon gold or russet potatoes, peeled and diced
6 ears of fresh corn cut from the cob or 2lbs. frozen kernel corn
Salt and freshly ground black pepper
Cayenne (optional)
1/4 cup freshly grated sharp cheddar cheese


Cook the bacon in a large stock pot until crisp.  Remove from pot with a slotted spoon and allow to drain on a paper towel lined plate and reserve.  Remove all but 2 tablespoons of bacon fat from the pot and add one tablespoon of butter to the pot, lower the heat to medium and add the onion and saute until translucent then add the garlic and saute 1 more minute.. Dust the vegetables with flour and stir to coat everything well.  Cook the flour off for about 3 to 4 minutes, stirring constantly to make sure nothing sticks and burns on the bottom of the pot.


Whisk in the stock one cup at a time and bring to a boil.


Add the potatoes, bring to a boil.  Boil for about 5 minutes, until the potatoes soften and are almost to the point of breaking down.  The broken-down potatoes will give the soup body and a smooth texture and the potatoes that remain in tact with the the soup a little something-something.


Add the cream to the soup, gently stir to blend.  Once the soup begins to bubble, lower the heat to simmer and cook for about 15 minutes; enough time for the corn to soften up a bit.  Season to taste with salt and pepper and a little splash of extra virgin olive oil and maybe even a little dash of cayenne.


 Ladle a generous helping of this hearty chowder into a bowl and garnish with the sharp cheddar cheese and the reserved bacon.


Does anyone know who got kicked off "Dancing with the Stars" this week?  Wait, don't tell me, I want to be surprised!

Stay warm, dry and well-fed!


Wednesday, October 12, 2011

Geauxing to the Grill with Chicken and a White Barbecue Sauce

This is so crazy to even think of; it quite might make your stomach turn.  The intrigue and the curiosity will undoubtedly make you try this.  Seriously, you won't be able to help yourself!  This is what happened to me me when I saw it on Down Home with the Neelys.

My tailgaters said this was the best grilled chicken ever!

White Barbecue Sauce:

1 cup mayonnaise

1 cup apple cider vinegar
1 lemon, juiced
1 teaspoon cracked black pepper
1 teaspoon salt
1 teaspoon garlic powder
1 teaspoon onion powder
1/2 teaspoon cayenne pepper


Whisk all the barbecue sauce ingredients together in a bowl. Cover with plastic wrap and refrigerate for at least 2 hours. when it's time to use, reserve about 3/4 cup to serve on the side.


You can use a whole chicken cut up or I used a pack  (5 each , thighs and 11 each drumettes) of bone-in, skin-on thighs and drumettes.  Season the chicken to your liking.  I used Lawry's season salt, lemon pepper, onion powder and garlic powder.

Pre-heat the grill to medium-high.  Spray the grates with non-stick cooking spray. 

Place the chicken skin side down starting in the center of the grill. Sear about 5 to 7 minutes each side to get some nice grill marks and begin browning the skin. 

I have hot spots on my grill because SOMEONE needs to buy a new burner and I don't own a Big Green Egg.  Be careful to keep the chicken away from an area you know flames up higher than other areas because the chicken skin is very fatty and will cause the grill to flame up and you will have crispy blackened chicken in an instant.


If you have two burners on your grill turn one off and move the chicken to the side of the grill where the burner is turned off.  Brush the chicken with the barbecue sauce.  You will continue grilling the chicken over indirect heat.  Leave the other burner on medium to medium-low.  Turn about every 10 minutes and brush with the barbecue sauce. 


Once the juices run clear, which should take about 30 to 35 minutes.


Transfer to a serving platter.


Don't forget to serve with sauce on the side!


Monday, October 10, 2011

This Ain't Ya Mama's Green Bean Casserole


Thanksgiving is creeping up on us ever so quietly.  Some of you real organized people out there already have your menu planned, the table set and the giblets gibletting.  Sorry to say, not me. I am tweaking and primping. 

A couple of years ago, I showed you a N'Awlins style Thanksgiving and passed a comment to the effect that I thought it might just be against the law not to serve green bean casserole on Thanksgiving.  I've been a rebel because I've never, ever served it at my table.   The whole cream of mushroom soup grossed me out.   It's so salty, and tastes blech!

I found a way to make a way better green bean casserole and I'm sharing it with you early in case you want to try it out and surprise your gift the the new green bean Casserole on the block!


Rinse and drain 1 lb. of haricot verts (fresh, French style green beans).


Add the greens beans to a pot of boiling, generously salted water.  Once the water returns to a boil, cook the beans for 2 minutes.


Use a slotted spoon or colander to drain;  remove the beans from the boiling water and immediately immerse them in an ice bath to stop them from cooking.  This beans will be tender but crispy when you serve them.  So much better than the limp beans in a can.  Once the beans have cooled, drain and set them aside.


In a large skillet over medium-high heat, melt 2 tablespoons of butter and heat 1 tablespoon of extra virgin olive oil.


Once the butter begins to bubble, add in 1lb. of sliced mushrooms and 1 tablespoon of chopped, fresh thyme leaves.  Either button mushrooms or baby bellas will work nicely.  Saute the mushrooms until they begin to turn golden brown.  Don't move them around too much.  After the mushrooms have been cooking for about 5 minutes, add in 2 tablespoons of minced garlic and saute along with the mushrooms.  This will take about 10 minutes.  Once the mushrooms have browned, add 2 tablespoons of flour to the skillet and thoroughly blend in with the mushrooms and oil.  Stir frequently and allow the flour to cook for about 2 minutes to get rid the pasty flavor.


 Lower heat to medium and slowly add 3/4 cup chicken broth and thoroughly combine.


Add 3/4 cup heavy cream.  Gently stir to combine.  Allow the mixture to come to a low boil, lower heat to medium-low and gently simmer for 5 to 7 minutes. 


Season with salt and pepper.


Remove the skillet from the heat and fold in 1 cup of shredded Gruyere cheese until cheese is melted.


Toss in the green beans until they are completely covered with the creamy mushroom mixture.  Turn the green beans into a buttered, oven-safe casserole dish.


In a medium bowl, combine 1 cup of French fried onions, 1/2 cup chopped pecans and 1/2 cup Panko crumbs.  Stir in 4 tablespoons of melted butter.


Pour the topping over the green beans.  Bake in a preheated 375 degree F oven for 30 minutes.  check the casserole after 20 minutes.  if top is sufficiently browned, cover with foil and continue baking for the remaining 10 minutes.


I'm seeing so many Thanksgiving law-abiding cooks out there this holiday season.

Happy early Thanksgiving!